先日VSCodeのAdobe XDプラグインが公開され、Adobe XDで作成したプロトタイプをコーディングに利用することが可能になりました。 利用までの手順と、実際に何ができて何ができないのか?試してみたので記録しておきます。
Adobe XD + VSCode でできること
- Adobe XD のアセット(カラー/文字スタイル)に名前を付けて、デザイントークンとして扱う
- たとえば カラー #115293 を
primary-darkのように
- たとえば カラー #115293 を
- CSSなどの各マークアップ言語・プログラミング言語での、デザイントークンのコードを生成できる
- 生成されたコードを利用することで、コードの変更なしに、XDで行われたデザイントークンの変更を反映できる
- VSCode の Adobe XD プラグインを使うと次のことができる
- Creative Cloudライブラリの共有URL経由で、Creative Cloudライブラリに登録されているXDドキュメントのアセットをインポートして、DSPファイルを作成・更新マージできる
- VSCode上でDSPファイル中のデザイントークンの説明を追記したり、コンポーネントのスニペットを書いたりできる
Adobe XD + VSCode でできないこと
- VSCode上でDSPに加えた変更を、Adobe XDのアセットに同期することはできない(XD → DSPの変更取り込みはできる)
- Adobe XDのコンポーネントから各言語のソースコードを作成することはできない
操作手順
前提
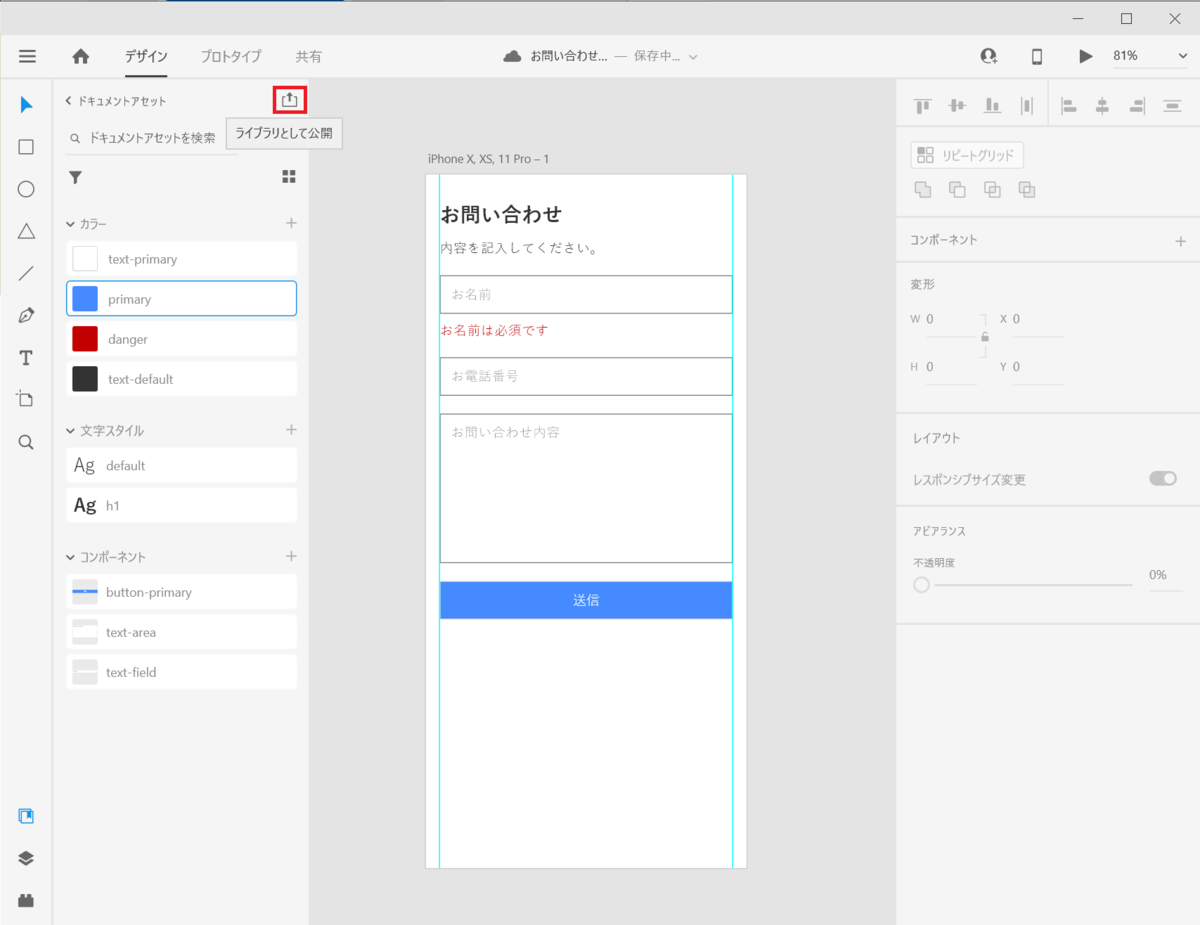
1. Adobe XD のアセットをCCライブラリに公開する
アセットの各アイテムに名前を付け、公開します。

2. VSCode への Adobe XD プラグインのインストール
VSCodeを開いて Adobe XD プラグインを検索してインストールします。 なおこのプラグインはグローバルで有効化されるので、リモート開発でも個別にインストールする必要はありません。

3. Adobe XD プラグインで DSP: Design System Package を作成
使用したいプロジェクトでXDプラグインを使います。

[Create package] へ進み、適当なパッケージ名と保存先を指定します。 Adobe CCライブラリで取得した共有リンクを指定してインポートを実行します。


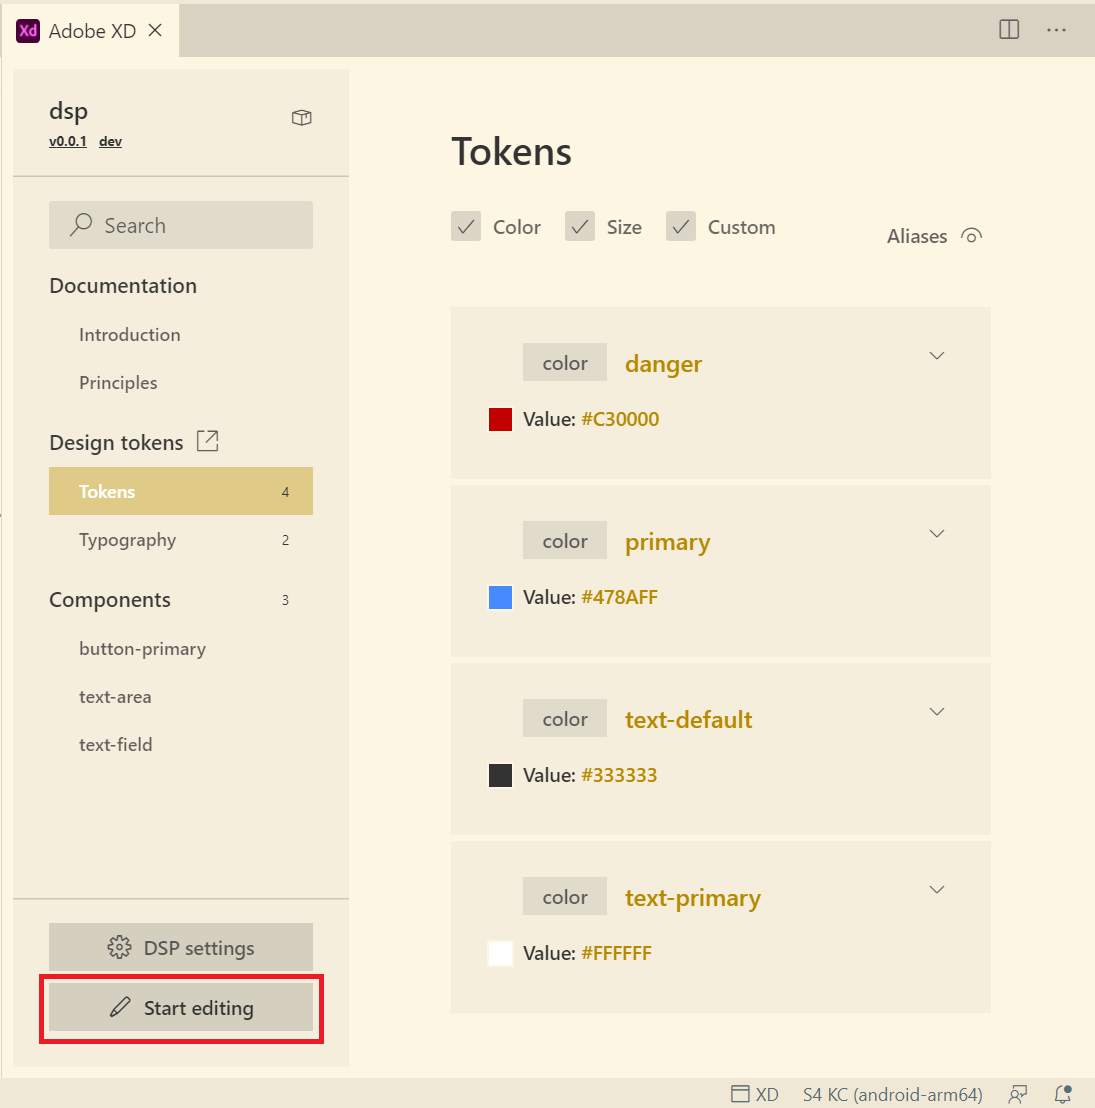
4. DSPからコードを生成する
Start editingから編集モードに入り、Finish editingを押して終了すると、そのタイミングでターゲットへのコンパイルが行われます。


/**
 * Do not edit directly
 * Generated on Fri, 20 Nov 2020 10:20:42 GMT
 */

:root {
  --text-primary: #ffffff;
  --primary: #478aff;
  --text-default: #333333;
  --danger: #c30000;
  --default-family: Yu Gothic;
  --default-weight: Regular;
  --h-1-family: Yu Gothic;
  --h-1-weight: Bold;
  --default-size: 16rem;
  --h-1-size: 24rem;
}
//
// style_dictionary.dart
//
// Do not edit directly
// Generated on Fri, 20 Nov 2020 10:20:42 GMT
//


import 'dart:ui';

class StyleDictionary {
  StyleDictionary._();

    static const danger = Color(0xFFC30000);
    static const primary = Color(0xFF478AFF);
    static const textDefault = Color(0xFF333333);
    static const textPrimary = Color(0xFFFFFFFF);
    static const defaultFamily = "Yu Gothic";
    static const defaultWeight = "Regular";
    static const h1Family = "Yu Gothic";
    static const h1Weight = "Bold";
    static const defaultSize = 256.00;
    static const h1Size = 384.00;
}
5. 生成されたコードを利用する
入力したパッケージ名/dist/styledictionary/flutter/style_dictionary.dart に生成されたファイルがあるのでインポートして使います。
import 'style_dictionary.dart';

// 省略

  @override
  Widget build(BuildContext context) {
    return Scaffold(
      body: SafeArea(
        child: SizedBox.expand(
          child: Container(
            color: StyleDictionary.primary,
            child: Text(
              "Hello",
              style: TextStyle(
                color: StyleDictionary.textPrimary
              )
            ),
          )
        )
      )
    );
  }
その他
ビルド設定を変更する
ためしに flutter の書き出し先を変更してみます。
設定ファイルを作成
DSP名/dist/styledictionary/config.js に Style Dictionary のビルド設定がありますが、これは自動生成されるため変更できません。
config2.js など適当なファイルにコピーしてこちらを変更します。
// config2.js
const StyleDictionary = require('style-dictionary').extend({
  "source": [
    "properties/colors.json",
    "properties/fonts.json",
    "properties/custom.json",
    "properties/sizes.json"
  ],
  "platforms": {
    "css": {
      "files": [
        {
          "destination": "variables.css",
          "format": "css/variables"
        }
      ],
      "transformGroup": "css",
      "buildPath": "css/"
    },
    "flutter": {
      "files": [
        {
          "destination": "style_dictionary.dart",
          "format": "flutter/class.dart",
          "className": "StyleDictionary"
        }
      ],
      "transformGroup": "flutter",
//      "buildPath": "flutter/"
      "buildPath": "../../../lib/"  // 変更
    }
  }
});
// (省略)
2. DSP settings
VSCodeのXDプラグインのDSP settingsを変更します。


変更後は再度 Start editing & Finish editing すると実行されます。

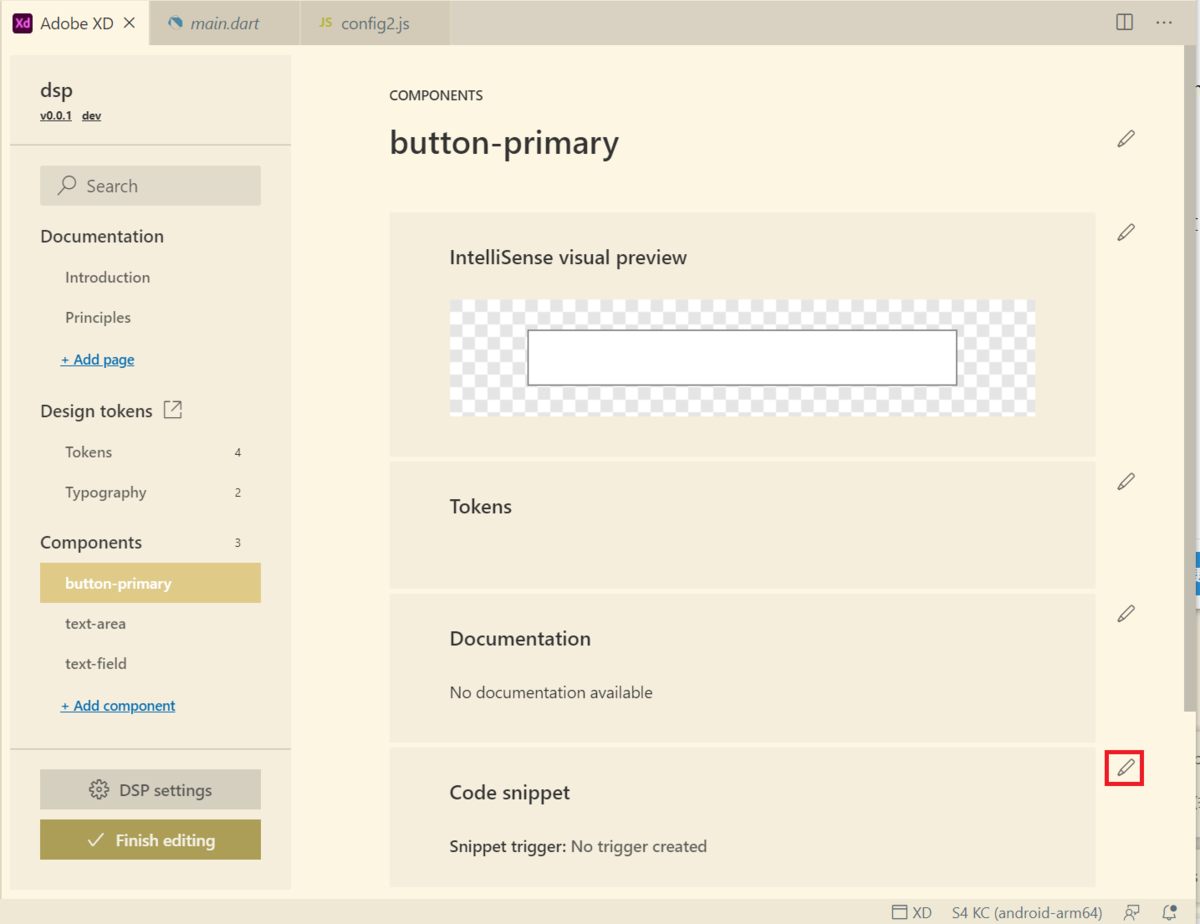
コードスニペットを使う
コードスニペットの登録
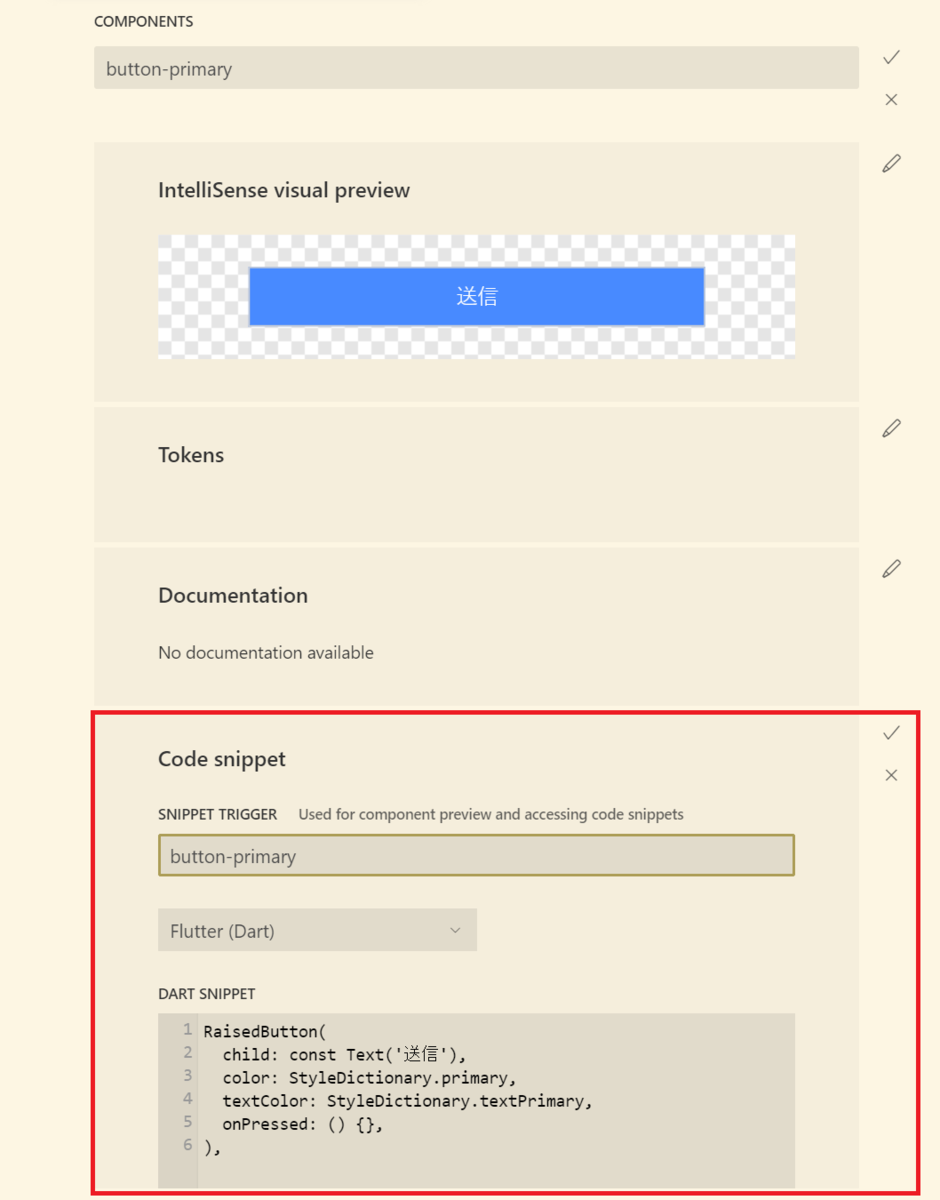

終わったらFinish editingをクリック
コードスニペットの使用
DSPを読み込んだプロジェクト内でトリガー文字列を入力するとポップアップで表示され、Enterキーでスニペットが挿入されます。

Adobe XDでの更新を取り込む
Adobe XD で変更すると『更新を公開』できるので、公開します。


DSP settings の CC LIBRARY LINK の Import ボタンをクリックすると、更新分をマージできます。

Start editing が出てこない
VSCodeのどのフォルダー/ワークスペースでもないグローバルの画面で XD プラグインを開き、DSPパッケージを作成または読み込んだとき、DSP settings も Start editing も見当たりません。

これを解決するには、DSPを使用するフォルダー/ワークスペースでDSPを読み込むか、グローバルエディターの機能を有効にします。

